


XenDesktop-RemotePC-Studio
Jump To: Support > KB > Citrix > XenDesktop > RemotePC > Studio
Adding PCs to your virtual desktop site
Automatic assigning of PCs to users
- Open Citrix Studio
- Click on Machine Catalogs and search for a catalog which has a type of Single-session OS (Remote PC Access):

- If you cannot see a Remote PC Access catalog (if you have an older version of XenDesktop) look for a catalog with Allocation Type = Static, Desktop OS, Provisioning method: manual and User data = - or On local disk. You will then need to follow the manual instructions below:

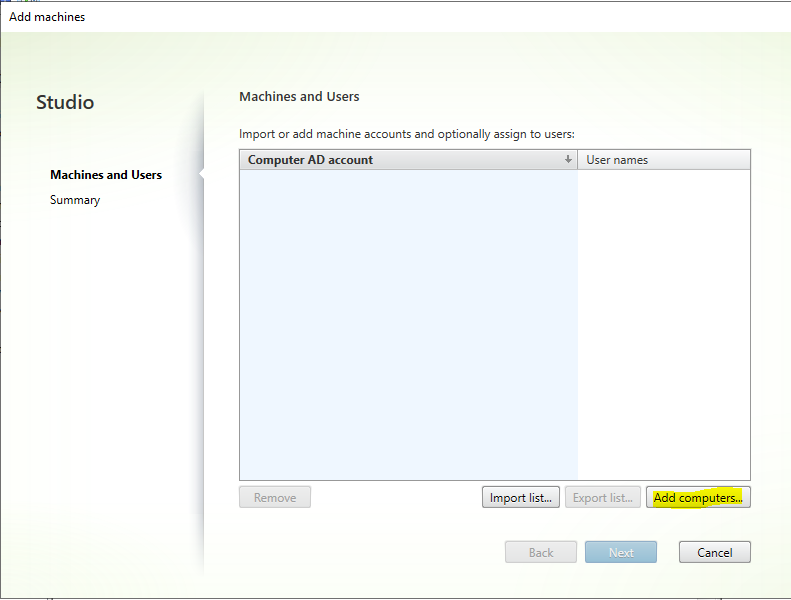
- Once you have found the machine catalog, select it (not double-click) and then click on Add Machines on the right-hand side (you may also right-click on it and pick Add Machines):

- For a one-off or small number of computers, click on Add computers...'. If you want to add a lot of computers, read the instructions below:
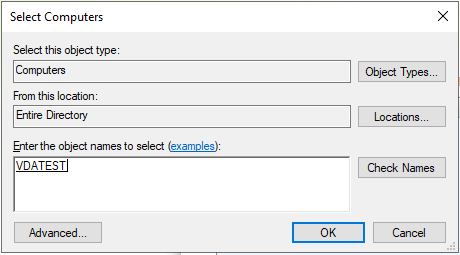
- Enter the name of the computer you want to add and click on Check Names. The computer name should underline, so click OK:
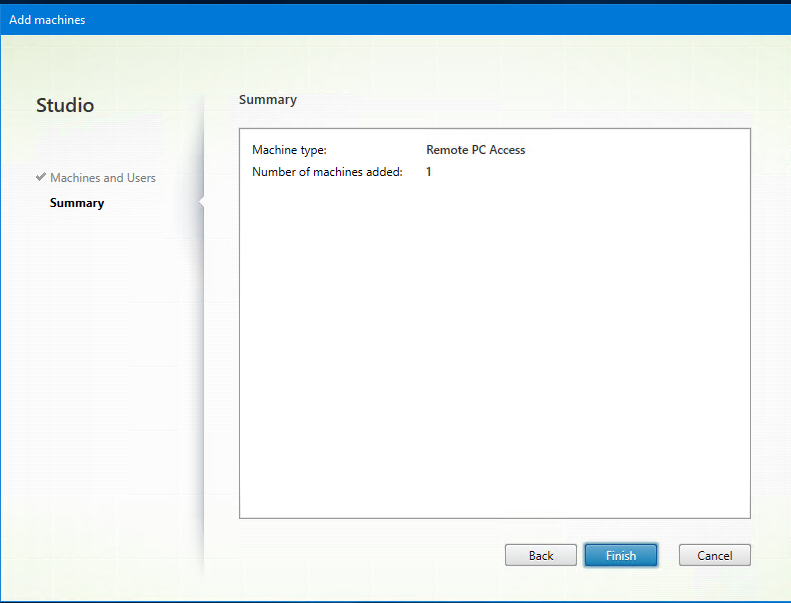
- Repeat until you have added all the computers you want to add, then click Next to get to the confirmation page. Click Finish:

- You can now find your machine catalog and double-click on it to see the machines. If the VDA is installed you should see the machines are registered and there is no user assigned (User column is empty):

- Next time a valid user (as defined is the Desktop Assignment Rules) logs onto one of those PCs, the machine will be permanently assigned to them. i.e. after they have logged off, their name will be listed in the User column:

Manual assigning of users
Of course, if all users are working remotely, they may not have access to their physical PC to log on to allow it to be assigned to them. You may also want to assign the machine to them to be certain they don't get assign to the wrong one if they log on elsewhere first.
- Follow instructions above until you get to the list of machines and users:
- Click on the User names column alongside the computer you wish to assign and click on the ... button:
- The Select Users or Groups window will open, so enter the username of the person you want to access this computer and click OK (you can press Check Names if unsure):
- The username column will now be filled in on the Add machines windows:
- Repeat to add any extra computers. When you have finished, click Next to view the confirmation window:
- Click Finish to confirm
Adding multiple computers
By OU
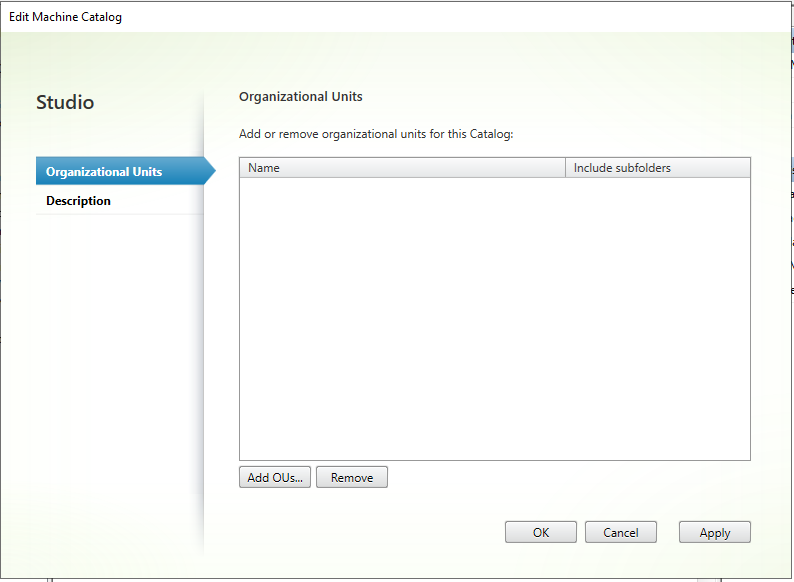
- To add an OU of machines, find the machine catalog as above, right-click on it and choose Edit Machine Catalog:
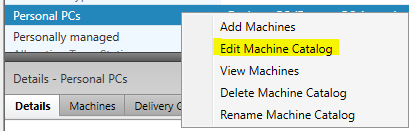
- You can then use the Add OUs button to choose your OUs:
By CSV file
- Firstly create your CSV. The column headings should be
[ADComputerAccount]and[AssignedUsers]. In the[ADComputerAccount]colum, enter the machine account name (beginning with DOMAIN\ and ending with a $). In the[AssignedUsers]column, enter the username (beginning with DOMAIN\) or leave blank. For example:[ADComputerAccount],[AssignedUsers] DOMAIN\VDATEST$,DOMAIN\username
- Within Studio, find the machine catalog as above, select it (not double-click) and then click on Add Machines on the right-hand side (you may also right-click on it and pick Add Machines):
- Use the Import list.. button to import your CSV file