


XenServer-VDISize
Jump To: Support > KB > Citrix > XenServer > VDISize
Increasing size of virtual disk in XenServer
These instruction cover usage of Server 2008, 2008R2, 2012 or 2012R2 on your VMs. Similar methods are possible with other OSes (e.g. Windows XP, NetBSD), but are not documented here
Prerequisite precautions
- Ensure your data is backed up
- You should not have snapshots of your VM. If you do, you should remove very soon after resizing
- Your storage repository should not be full or overcommited on space (look at the size line on the General tab against the storage repository). An example is 331.4 GB used of 3907.8 GB total (480 GB allocated). We can see that this is not full, nor is the allocated space larger than the total.
Procedure
- Open XenCenter and connect to your pool
- Locate the virtual machine and click on it in the left-hand panel
- Shutdown the virtual machine by click on the Shut Down button in the top bar
- Select the Storage tab
- Click on the virtual disk you wish to increase and click on Properties
- Click on Size and Location on the left-hand side
- Alter the size of the virtual disk as appropriate. As you can easily increase it further in the future, but not decrease it, you should not increase the size by more than you need:
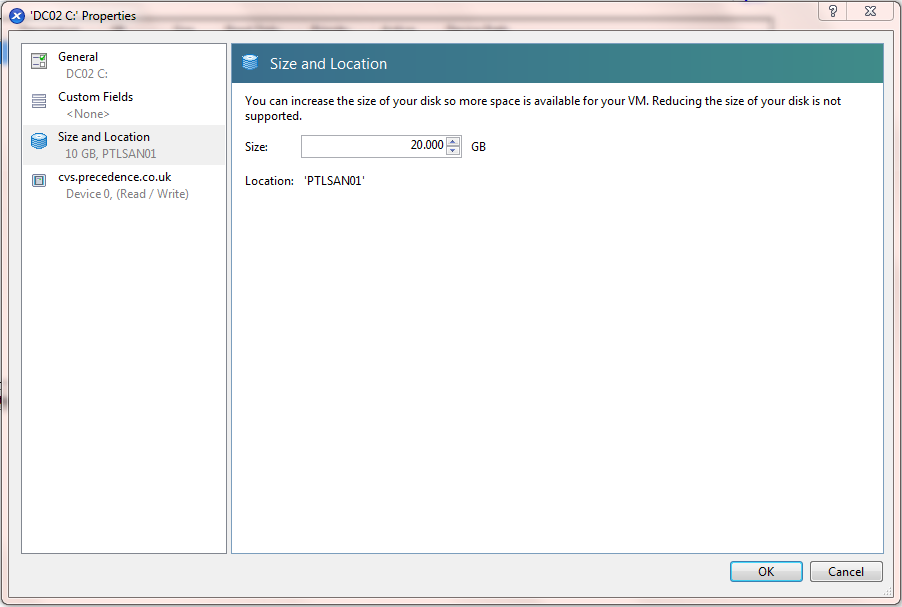
- Click OK
- Start the virtual machine
- Login as administrator and go to Server Manager (on task bar or by right-clicking on Computer and choosing Manage)
- Expand out Storage in left-hand panel and click on Disk Management
- Find the disk you have just increased in size; you will see it has a band of unallocated space after the partition.
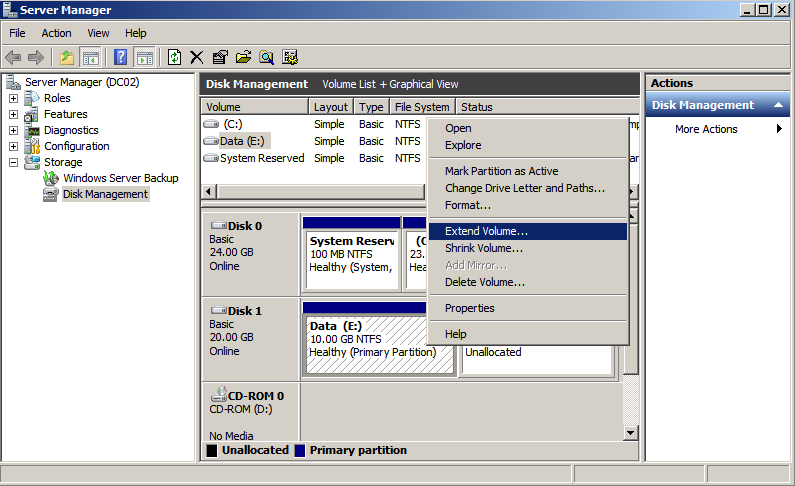
- Right-click on the partition and choose Extend volume...
- Extend Volume Wizard will open. Click Next >
- The correct disk should be already selected in the right-hand box and the extra space should be shown in the Select the amount of space in MB: field. Check the details:
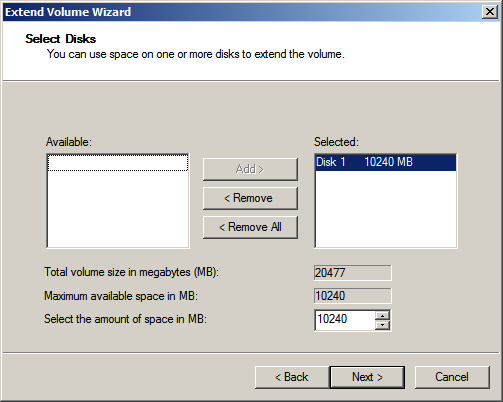
- Click Next >
- Click Finish
- Correct size will now be shown:
