


UniFiDemo
Using UniFi demo equipment
Prerequisite checks before requesting demo
Check that you can access http://unifi.ptlnet.com:8080/test without a proxy set in your browser. You should see a page headed with HTTP Status 404 - /test. If you do not, then the access point will not be able to speak to our cloud services. For full details, click here.
Installing demo equipment
- Unpack box carefully and locate the following:
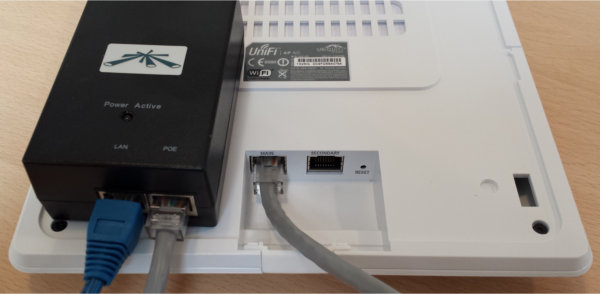
- Access point (remove mounting panel on underside to reveal the network sockets)
- Power injector
- Power lead
- Find 2 network leads
- Connect the socket labelled POE on the power injector to the socket on the access point that says MAIN or MAIN/48V (grey lead in photo)
- Connect the socket labelled LAN on the power injector to your network (blue lead in photo)
- Connect the power lead to the power injector and plug into mains
- Wait for access point to boot up. It should show a blue light around its central section
Using demo equipment
- SSID is
ptldemo - WPA passphrase is
s3curewifi - To access the management system visit https://unifi.ptlnet.com/ in your browser (should be Flash-enabled if possible). Username is demo. Password will be emailed to you on request