Jump To: Support > KB > ThinIT > Hardware > VESA
VESA mounts for ThinIT and AtomIQ machines
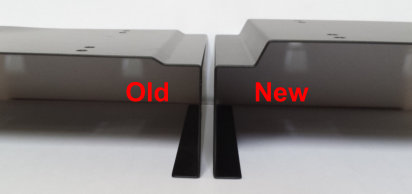
There are two different models of VESA mount. Later models have a deeper fold at the rear to ensure that screw heads do not scratch the case and to improve ventilation:
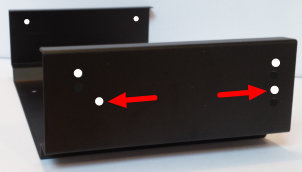
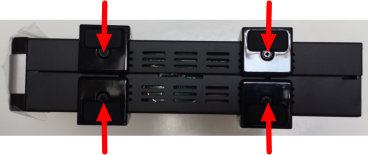
Later models also have more mounting holes to attach the mount to the client. This allows them to work with all generations of client machines and also to be attached at both sides which is more sturdy. Earlier mounts only had the two holes highlighted by red arrows:
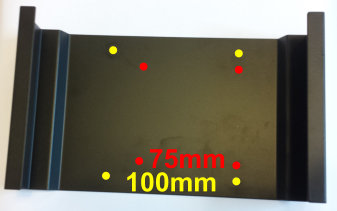
The mounts will work with both 75mm and 100mm VESA mounting holes:
Fitting
This discussion is based on our recent TCX, AtomIQx1 and AtomIQx2 clients. Earlier models have different cases and so may need to be mounted differently.
The screws that come with the client are quite long (as they used for mounting the feet) and it is possible to damage the client if they are fitted in the wrong holes. Therefore please take care to mount the brackets as per the description below:
- Decide which way you want to mount the client on the back of the monitor (either power-button facing up or facing left/right).
- Unbox your client. On the underside there will be 4 feet attached. Remove these feet by undoing the 4 screws (highlighted in red below). The feet can be discarded, but keep at least 2 of the screws:
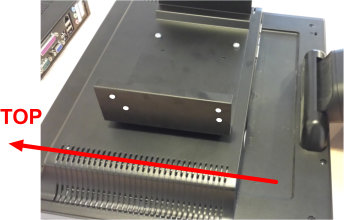
- Using the 4 steel screws provided with the mount, attach the mount to the monitor. The mount MUST be fitted the right way round:
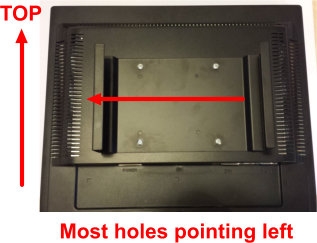
- If mounting the client facing up, the side of the mount with most holes must face to the left (when viewed from the rear of the monitor):
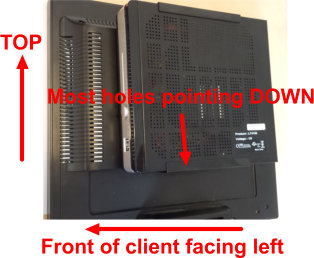
- If mounting the client facing left (when viewed from rear), the side of the mount with most holes must face down:
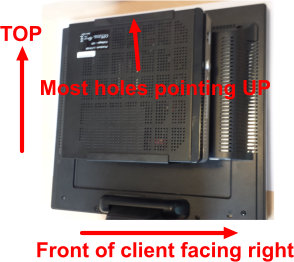
- If mounting the client facing right (when viewed from rear), the side of the mount with most holes must face up:
- If mounting the client facing up, the side of the mount with most holes must face to the left (when viewed from the rear of the monitor):
- Once the bracket is mounted, slide the client into place (remember your intended direction!). One screw at each side is sufficient to hold it in place. The original bottom of the client will be against the side of the bracket with most holes. Use the front-most hole at the top of the case, not any of the other five holes (the bottom of the client is the only side that has holes in the middle):
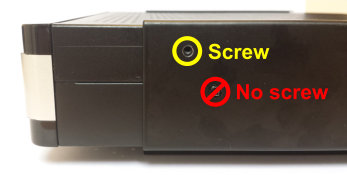
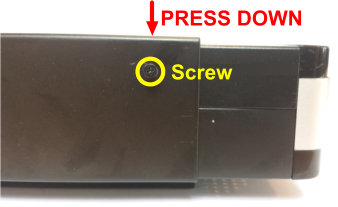
- Now turn your attention to the original top of the client. One screw should be fitted in the hole nearest the front of the case. You may find it beneficial to apply some pressure to the case of the client itself: