


Jump To: Support > KB > AD > DNS
Configuring Windows DNS as a Secondary DNS server
On most networks we support, our NetManager server will act as a primary DNS server. The NetManager uses BIND (the most widely used DNS server on the Internet) for DNS and is very often connected to the external and internal networks so is ideal as a primary DNS server. It is then generally sensible to configure a secondary DNS server for redundancy and to spread the load. For sites with only one NetManager it is generally recommended that this role is fulfilled by a Windows domain controller. Following are the details of how to do this. This is based on Windows Server 2008 but should be fairly standard across all Windows operating systems. This wiki page also assumes a basic understanding of TCP/IP and DNS operation.
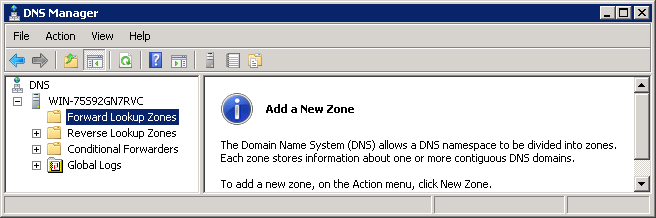
1. Open the DNS server console from 'Administrative Tools' and expand the server name if needs be (the server name in this example is 'WIN-75S92GN7RVC'. You should see something like the following.
2. Ensure you have 'Forward Lookup Zones' highlighted, right click on it and select 'New Zone' from the menu. A configuration wizard will then start.
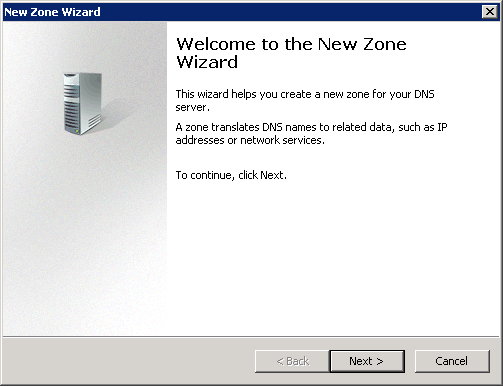
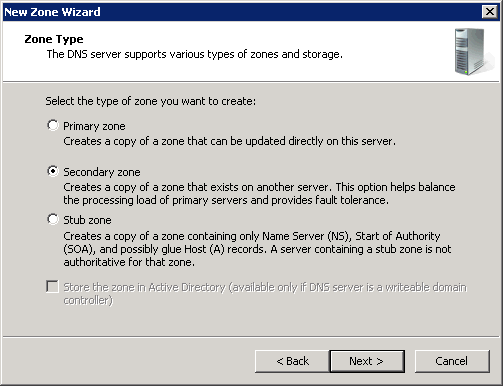
3. Click 'Next' on this Window and you will then be prompted for the zone type. Select 'Secondary' and click 'Next'.
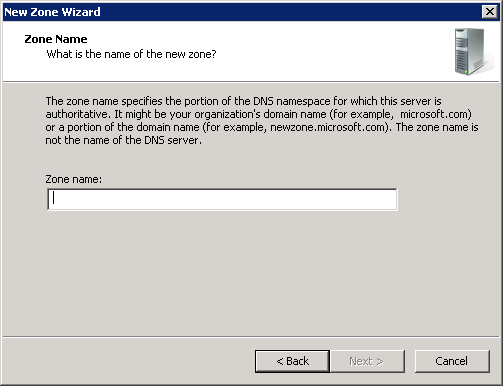
4. You will now be prompted for the zone name. Here you need to enter your site's internal FQDN and click 'Next'.
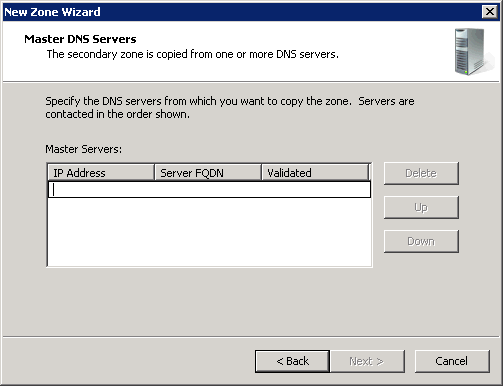
5. You are now prompted to enter the address of your primary DNS server. Enter the IP address of your NetManager here and click 'Next'.
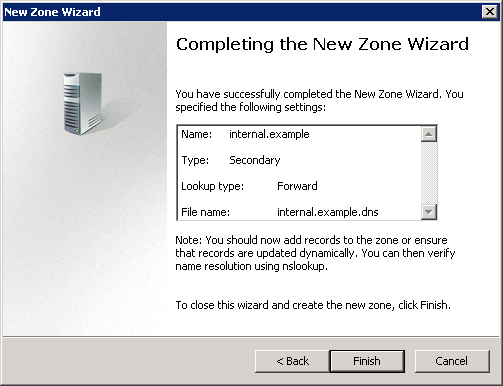
6. You will now be presented with a window showing the settings you have configured. If you are happy everything is correct click 'Finish'. The forward zone is now configured.
7. You can now configure the reverse lookup zone. Select and right click on the 'Reverse lookup zone' in the left pane (as you did for the forward lookup zone in step 2) and choose 'New Zone' from the menu. The new zone wizard will appear with the first two windows being the same as 2 and 3 above.
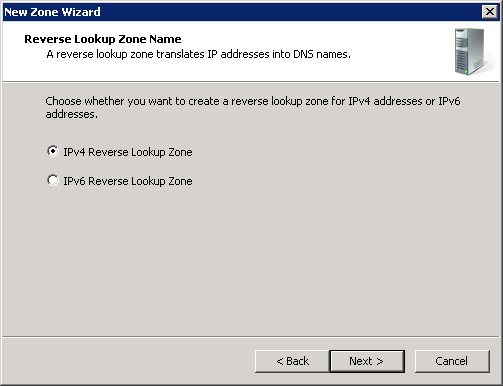
8. After clicking next on both these windows, you will be asked to choose whether to configure an IP4 or IP6 reverse lookup zone. You can choose here but it will generally be IP4 on an internal network. We have used IP4 for any examples here. Select the appropriate option and click 'Next'.
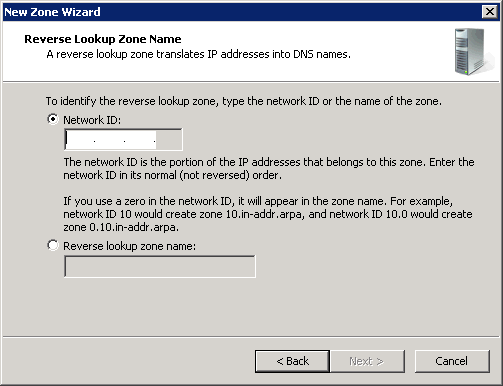
9. You will now be asked to enter the 'Network ID' for the zone. This should be the prefix of your IP address range (e.g. if you are running an IP range of 10.0.0.0 with a subnet mask of 255.255.0.0 then the prefix would be 10.0).
From here you can follow the instructions under 5 and 6 above as these are the same as for the forward zone. You have now completed the configuration.