


Jump To: Support > KB > NetManager > VPN > Server
OpenVPN Server Overview
The NetManager VPN server is based on OpenVPN which is an SSL VPN that has an excellent security record and wide support. SSL VPNs are easy to configure at both the server and client ends and are extremely flexible which allows them to be used even over very restrictive Internet connections (they will even work through web-proxies).
When a client computer connects to your VPN server, it will be able to access all network services just as if it was connected to the local network. This includes accessing shared files, desktops, printers and email.
The NetManager VPN server will generate configuration files for use on your client computers. In some cases, altering server settings would require all client configurations to be changed. Therefore, you should spend some time deciding on how you want the VPN to work so that you can get it right first time (the configuration section below highlights options that would require client updates).
The first major decision to be made is Authentication Type. Many VPN solutions use standard usernames and passwords, which makes for ease of use, but this is far from ideal from a security point of view. It is possible to do brute-force attacks on usernames and passwords and so, in effect, your network security is as strong as the weakest password. As the VPN username and password are often the same as those used for network access (e.g. a user's login account), this can easily give full access if a password is cracked. It is also easy for a guessed password to be circulated to other users. The NetManager VPN server does support username and password authentication, but we recommend against its use. The danger of using usernames and password is mitigated as the identity of the server will be verified by the client. This means that if someone malicious tried to pretend they were your NetManager in order to steal your details (this is known as a man-in-the-middle attack), they would be unable to do so. This identity verification uses certificates. You can also restrict the list of users and groups that are allowed access.
Our recommended method of authentication is to use public/private keys. The client computer has the private key which is held securely (and can be protected by a passphrase). The server has a copy of the corresponding public key which is used to verify the computer connecting. These keys are much longer than passwords and so are uncrackable. If a computer with a private key installed is lost or compromised, the details can be revoked at a click and new settings generated.
The downside to using public/private keys is that each clients' configuration is different. Each connecting computer needs a different certificate so that it can be distinguished from other clients (while it is possible for multiple clients to have the same configuration, only one would be able to log on at once). The NetManager has tools to make the management of this easier.
VPN Server Configuration
To configure the OpenVPN server, go to http://netmanager:880/private/network/vpn/ (replacing netmanager by the appropriate name if necessary). This is the same as choosing Network, then VPN in webadmin. If the VPN has never been configured the page will say VPN Server is not enabled.
To set up the VPN server, click on the Configure VPN Server tab.
Initial Certificate configuration
The first time you visit this page, you will need to enter your certificate details (it will display You must first configure the certificate details for this server). Please take time to ensure that you enter the correct details for your certificate as if you wish to change anything later, it may invalidate all your users' settings.
Once you have configured your certificate details, it will display the message Server certificates need to be created and a link labelled Click here to create them. This may take some time..
Once the certificates have been generated you will be presented with the following page:
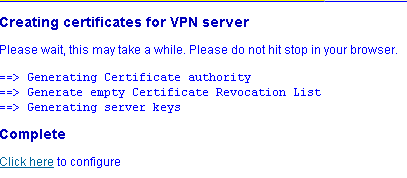
To configure the server in more detail, click on the appropriate link.
Enabling and Disabling
After your certificates have been configured, the next page simply gives you the option to enable or disable the VPN server (i.e. it can be used after configuration is complete to quickly disable the server). Choose Yes from the pull-down menu to enable the VPN server and click Save.
You will then be presented with the configuration page.
Click here for VPN server configuration in detail
Once you are happy you have your options configured as you want them, click the 'Save' button. You have now configured your VPN server. To double check this, click on the 'Connection Status' tab and ensure the VPN is running.
Managing client machines
If you have chosen to use public/private key authentication, you will need to create a configuration for each machine. If you are using username/password authentication, the same configuration file can be used on every machine.
Click here for details on creating a client configuration
You can now go ahead and configure your VPN Client configuration.