


Jump To: Support > KB > NetManager > Calendars > Outlook
Plugins for Outlook to add standard calendar and contact support
By default, Outlook can only subscribe to a standard network calendar (i.e. CalDAV) in a read-only mode. You may also publish a local writable calendar onto a network calendar server for others to view read-only, but you cannot have a single calendar that is writable by multiple users. This is because Outlook does not support CalDAV or CardDAV (allegedly CalDAV support was slated for Outlook 2013, but was removed before the final release)
Using Outlook without any plugins
By itself, Outlook can only subscribe to a standard network calendar (i.e. CalDAV) in a read-only mode. You may also publish a local writable calendar onto a network calendar server for others to view read-only. If this is good enough for you (or you do not want to install any plugins), details on how to use it can be found here. You cannot connect to standard CardDAV contacts servers with Outlook without a plugin.
Installing and configuring Outlook CalDav Synchronizer
- If you have Outlook open, close it down
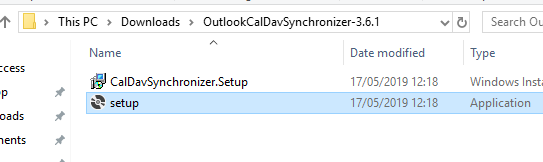
- Download Outlook CalDav Synchronizer as a zip file
- Extract files from the zip and run setup:
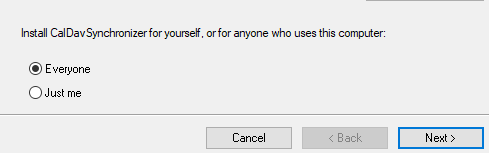
- Follow through installation in the usual fashion, changing the option for who to install it for from 'Just me' to 'All users' (unless you are using Outlook 2007 which does not support this):
- When you run Outlook again there will be a new CalDav Synchronizer menu option:
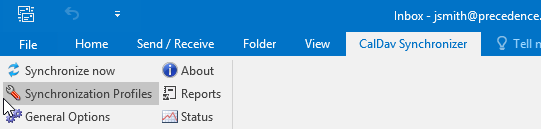
- Click on Synchronization profiles to add your accounts
- To add a new account, click on the
 icon. Leave Generic CalDav/CardDav ticked and click OK:
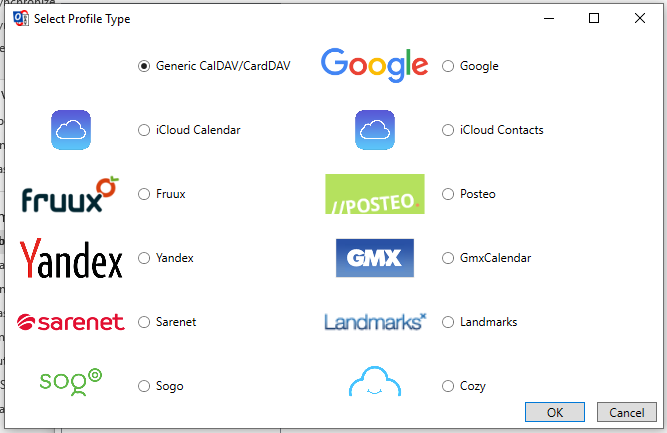
- On the window that comes up, click the link at the bottom labeled Show Advanced Settings.
- Enter a name at the top and enter your username, and email in the appropriate areas. Also tick the box labeled Use IMAP/POP3 account password.
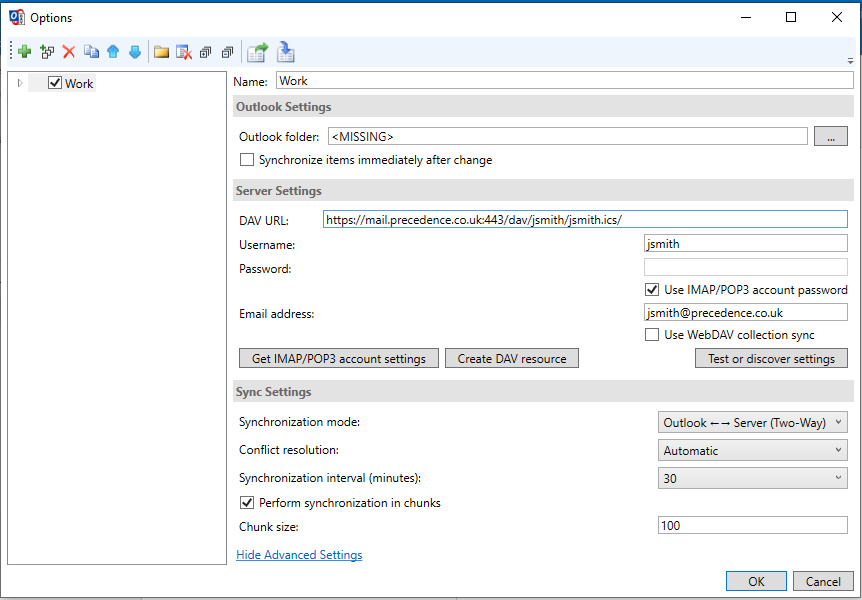
- Enter the CalDAV URL (i.e. ending in
.ics/for calendars or task-lists ) or CardDAV URL (i.e. ending in.vcf/for contacts) in the DAV Url: box. You can copy the https:// URL from the web-based calendar/contact client. - If you want the calendar to synchronise more frequently than every 30 minutes, change the Synchronisation interval to the desired frequency.
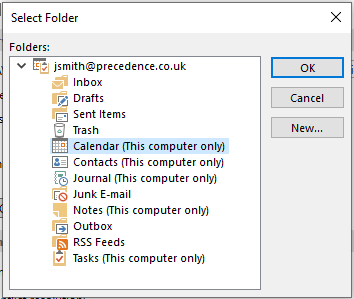
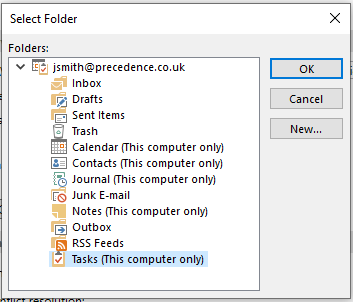
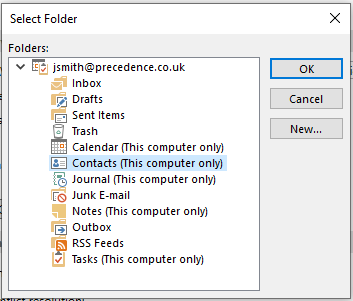
- Next you need to pick the folder to synchronise to. This must be of the correct type (i.e. Calendar, Tasks or Contacts). Select the local folder by clicking the
 icon and picking the appropriate folder from the folder window.
- For a calendar:
- For a task list:
- For contacts:
- You may add extra folders for separating out calendars and contacts by using the New button. Make sure any extra folders you create are of the right type:
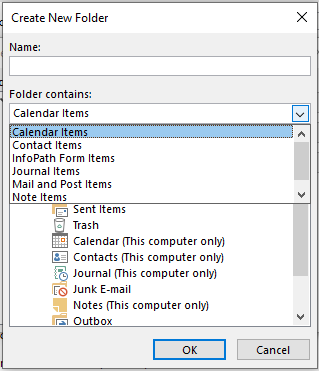
- For a calendar:
- Once you have picked the folder its name will be displayed. Tick the Synchronize items immediately after change and click Ok:

- Now click the OK button on the 'Options Window' to finish.
- Your calendars and contacts are now available in Outlook:
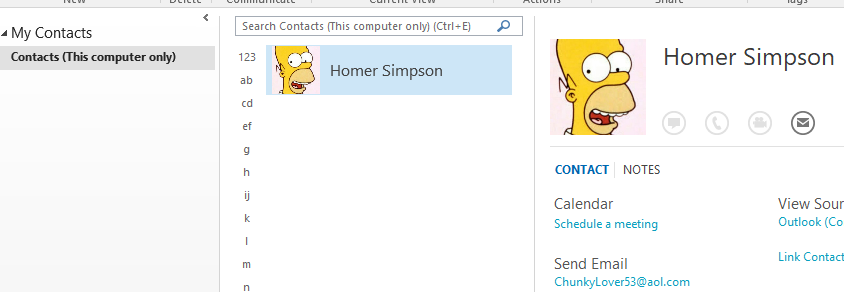
N.B. Outlook is unable to display images for contacts whose images are URLs. For example, the test contact created in Thunderbird is viewable correctly in everything except for Outlook. In the screenshot above the contact has been edited to have a image attached directly.