


Calendars-Lightning
Jump To: Support > KB > NetManager > Calendars > Lightning
Subscribing to your calendars from Thunderbird
Thunderbird is a powerful email client which has hundreds of add-ons for it. Lightning is the calendar add-on and is automatically included with Thunderbird when you install it. When you first run Thunderbird, it will remind you of these and ask you to confirm you want to keep it enabled:
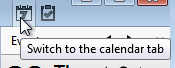
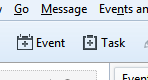
- Open Thunderbird. If necessary, open the calendar window by choosing Calendar from the Events and Tasks menu (or press Ctrl-Shift-C). You can also click on the Calendar tab button at the top:
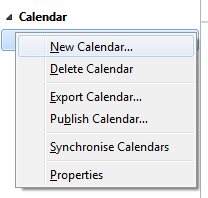
- In the calendar section on the left, right-click and choose New calendar...:
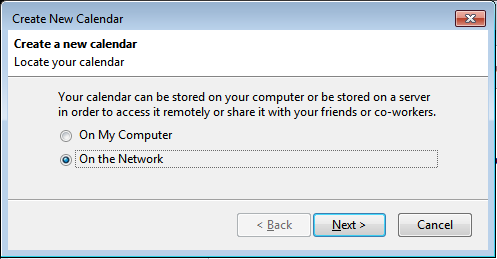
- Pick On the Network and click Next>:
- On the Create new calendar page, select CalDAV and enter the calendar address.
To determine the address, log onto the web-based calendar viewer, find the calendar you want to subscribe to, right-click on the https:// link underneath Subscribe as CalDAV and copy the address (Copy link address' in Chrome, Copy shortcut'' in Internet Explorer). Paste this into the address. To create a new calendar, enter a non-existent one that you have read/write access to (e.g. https://servername/dav/username/birthday.ics/) and it will be automatically created.
Click Next>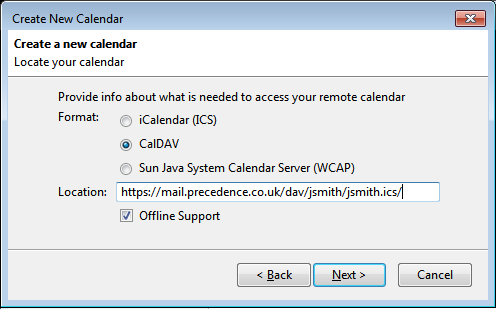
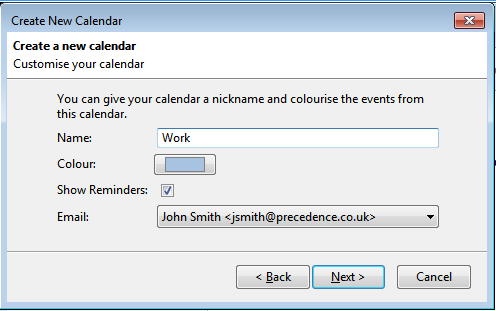
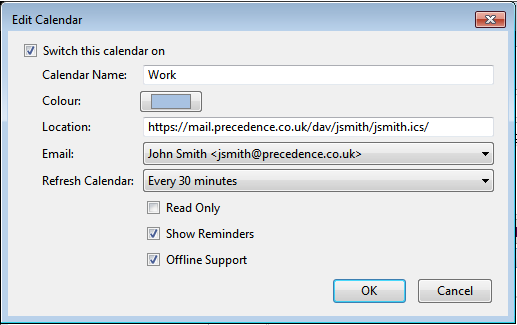
- Enter a name for the calendar, pick a colour and decide whether you want to be notified about reminders. Click Next>:
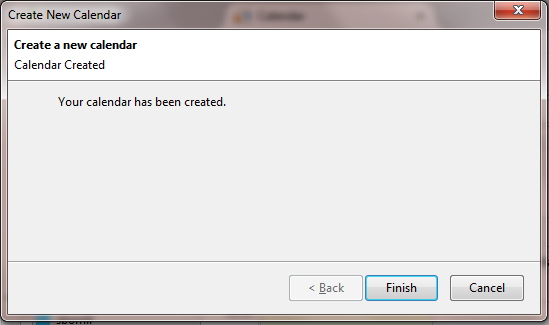
- Click Finish to confirm:
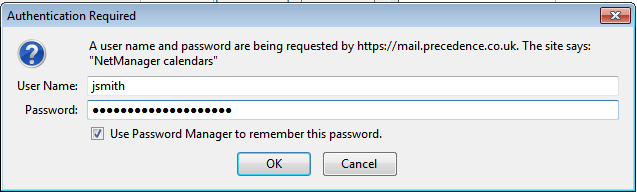
- You may be prompted for a username and password, if so, just enter your usual details and tick the box to save the password:
- You have now subscribed to the calendar and can view and create events.
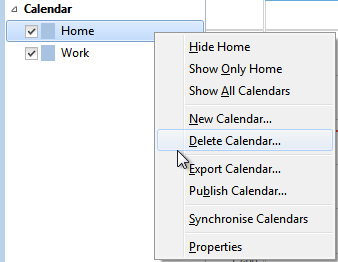
- You can subscribe to as many calendars as you want. By default, there is a local unshared calendar called Home. To avoid confusion, it is best to delete this by right-clicking and choosing Delete calendar. You can unsubscribe to any other calendars in the same way (with network calendars, the calendar won't actually be deleted, you'll just unsubscribe):
- If you only have read-only access to the calendar, to avoid any warnings, you should set it as read-only . To do this, right-click on the calendar name on the left and choose Properties. Tick the Read Only box. From the same window, you can disable calendars temporarily, change colour, etc.:
Creating an entry and viewing on-line
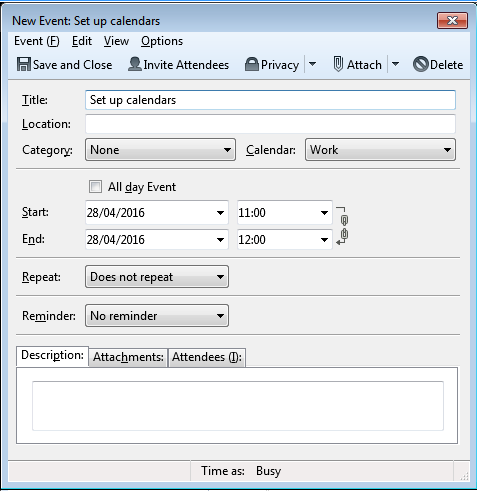
- Click on New Event to add a new event:
- Enter the details of the event. If you have access to multiple calendars, make sure you create it on the right one (by default, it will be created in the calendar you have selected on the left-hand side of the main calendar page):
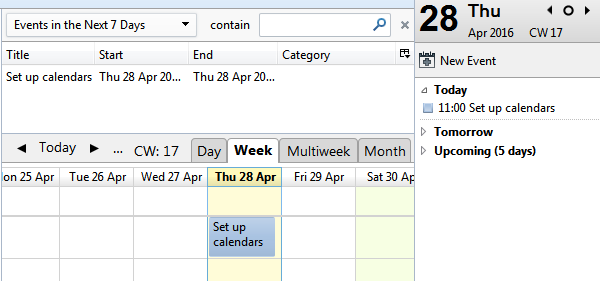
- The entry has now been created and is visible in Lightning:
- To check it really is accessible on the network, log onto to the Web-based calendar viewer and select the same calendar:
You may create tasks in a similar fashion.